Saturday, December 31, 2011

Have a Happy New Year!

Hi everyone. I can't get over the fact that 2011 is just about over and done with. Where the heck did it go? Whew! How time seems to speed up each year.

I wanted to make a short post and wish you a happy and bright new year. I want to thank each and every one of you who might read along and post comments and support me. It means so much to me. I wish you the best in health, love and laughter and hope you have wonderful year in 2012.

Cheers to a wonderful night and be safe everybody!

Wednesday, December 28, 2011

So You Want To Be A Blogger

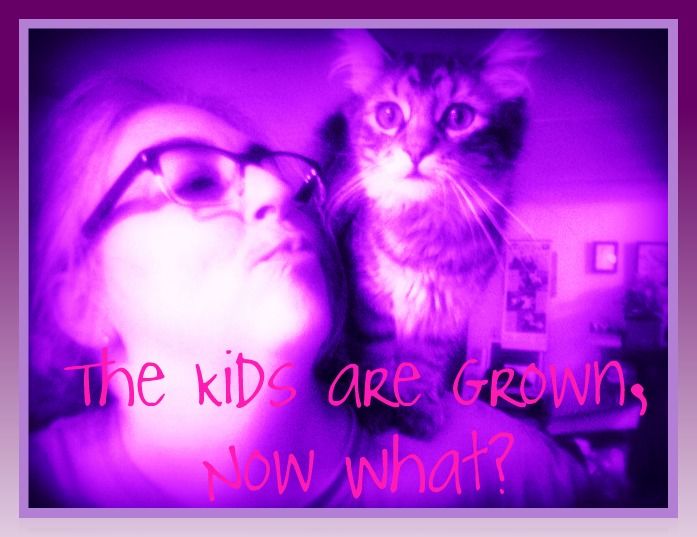
I used to think blogging was the goofiest, most narcissistic thing ever (I even knocked the word "BLOG") until one day when I was hunting around the Internet in search of a particular decoration project. I was online looking for ideas and came across Thrifty Decor Chick! I started reading her blog and kept going back to see the latest and greatest. I couldn't believe how cool and informative a blog could be. I had the impression a blog was more like someones diary that just shouldn't be shared with anyone. I loved reading and seeing pictures on this one blog. I started reading other blogs and kinda sat back and thought to myself, I can do this. I love it when I have time to roam and look at blogs to see what other people do. I have been told I have the gift of gab(not sure if that is always a great thing but it does help me avoid writer's block!) plus I have a passion for page layout and design. So the blog emerged!  

Blogging to me is challenging yet a wonderful hobby. With young children at home, it's a huge creative outlet and it forces me to do the projects I want to do around the house because I feel like I need to be accountable as far as sharing my ideas to anyone who may be reading. It pushes me in a way I like to be pushed. I'm wired not to sit still. Can't help it, I get it honest but I LOVE doing home projects!  

If you are at all interested in blogging I encourage you to take your time to learn as you go. I purchased a book that really helped me get started. Try and get as much information as you can at first. I am certainly no expert and am still learning a lot myself!

Here are a few things to consider for starters!

A) Come up with a main focus for your blog, whether the subject be finances, homeschooling, couponing, crafting, etc. Put some serious thought into it and go for it. Write like you talk! Enjoy it. OWN it! Make it what you want because it's all YOU!

B) Spend time thinking of a name, a screen name if you want one, the arrangement of your blog and the design. 
  
C)Research and patience are key! Research the different blogging templates. Try and make a lot of the design decisions up front. At first I spent a lot of time adding things to my blog because I thought it was cool to see how things worked. Over time I have changed so many things about it. There are so many resources out there to help you with this.

Remember that it may take you a while to learn to do one thing, like making a button for your blog, etc. If you're anything like me you might find that each and every little thing feels like a major accomplishment. It's a great feeling for me to make something work. If you are blogging for money, patience! Hopefully it will come with time. 

Best thing about blogging for me is making friends, learning and watching the blog grow slowly and just enjoying being productive. It's an awesome outlet!

If you are at all interested in joining a "newbie" blog hop, please come join some other newbies at http://goingcrazywannago.com/category/newbie-blog-hop/


The Kids Are Grown, Now What?

Tuesday, December 27, 2011

Why Do I Do This To Myself?

PILES EVERYWHERE!

I just can't sit still! It's Christmas break and I have done it again! I've started a couple new organizing projects while the house is in total disarray from Christmas day. Hey I rhymed! I just don't know how to do one thing until I have it complete and it is driving me absolutely bonkers! I wish I could hit the rewind button and clean up the house first now!

I want to go through the toys and make a pile to donate. Toys are EVERYWHERE! GRRR!

It may not look that bad to you but I didn't take pix of each room so you could see how FAR toys are scattered. What a messy mess!

I also started going through the kids' closets to weed through their clothes so we can get all the things they've outgrown OUT! UGGGHHH! 
 

Piles are EVERYWHERE I tell you! I must learn how to relax on days off. 

How do you relax? Do you go crazy doing tons of projects and things at once OR are you good at prioritizing your many tasks of the home??? Would love to hear any of YOUR tips and tricks of handling the aftermath of the hectic Christmas day with little kiddos!

Your friend,
who is drowning in STUFF and eating her words of trying to Keep IT Simple today.


Friday, December 23, 2011

Snow Ball Arrangement

What's up? How are you? Things are pretty good here. I'm in a humbled, sort of reflecting kind of mood tonight just thinking about how this day turned out. I try not to share too much personal info but I guess I'll talk about my day a little. 

Today started out good. My husband and I were both off to try and work and get some things done around the house in preparation for Christmas. Things have been very rushed so the kids went to their child care center and I did my grocery shopping "kidless" for a change. While I was at the store my husband played Santa, assembling the toys that needed to be put together so Christmas Eve wouldn't be such a late night. When I got home from the store I walked in to find that my husband was lying on the couch in severe pain. Come to find out he pulled his back out when he was putting something together. We spent two hours at Urgent Care and until today I have never seen my husband in such a helpless state. I pray I never see him like this again. It makes me very thankful that it was as minor as it was, even though he is experienced such pain. With all the hustle and bustle over the holidays, this experience brought both of us back down to earth, so to speak. It reminds me that in the grand scheme of things, family and close friends are utmost important in life. It reiterates the true meaning of Christmas! All the other stuff is just shstuff and not that important. Whew! I am so glad my hubs is okay but what a whirlwind of a day.

Having said that I did get crafty today with some material items because I needed a little release. :)  YAY for crafting and YAY for releases. This project idea evolved from an adorable decoration I saw over the summer when we went browsing in a Christmas store at the beach. What I saw was a bunch of sticks with Styrofoam balls that had red OR green sparkly swirls of paint on them. Each bunch of these cost nearly $20.00, which was quite pricey but they were WAY adorable, hence the need to replicate!

To do this project, all you need is:
Decorative sticks - I used glittery white ones from Dollar Tree - they came in a bunch
Styrofoam balls of different sizes. I used three packs, two from Dollar Tree and one from Hobby Lobby. 
Acrylic paints or glitter glue
Paint brush
Tooth picks to hold the ball when painting and to let dry 
Styrofoam square- as a drying rack

I mixed blue and white acrylic paint until I got the shade of blue I wanted. I covered the balls and let them dry overnight. 


Next I pushed the sticks through the balls and arranged them neatly in a vase. Now I have a contemporary decoration that blends well for Christmas! 


It's Overflowing


Tuesday, December 20, 2011

Display Christmas Cards On A Wreath

I did it! I got my Christmas cards made, printed, stuffed in envelopes and stamped to mail out tomorrow. Yippie! I was beginning to think I wasn't going to send them out this year but I'm psyched that they're done! I love sending cards and receiving cards and hearing from friends and family. We got one today from a friend we haven't heard from since last year this time so that was pretty cool! 

I normally put all my cards in a basket or some type of container but the cards aren't displayed that way, which is a big thumbs down! This year I discovered that I can use the mirror over the mantel as an extra decorating spot! I discovered the hangers you use with the removable tape! It's pretty sweet stuff! So I was able to easily attach the wreath to the mirror! Lots of exclamation points!


I had an extra straw wreath from my parent's garage and I wrapped it with thick velvety red ribbon leftover from making window wreaths. I hung the wreath and used push pins to hang the cards on the wreath. I just cover as I go or as I receive cards. :) I love it because it's a nice simple way to display the cards without having to take up a lot of room. The cards are confined to a nice small area on the mirror which is nice and neat!  


Monday, December 19, 2011

Frame Wrapping Paper

I've been wrapping presents for the past two hours and came up with an easy decoration! First off I am in total Christmas mode now! Don't tell my boss! Seriously though I am a little annoyed because I can't seem to find a few packages of gift card holders I bought. I stashed them away and managed to hide them from myself. Hmm. Maybe if I quit thinking about them they'll turn up! Here's hoping because they were just adorable!

Do you like to wrap or would you rather us a gift bag? I like wrapping because I think it's more fun opening a present that was wrapped. Anyhow I finally ran out of the numerous rolls of TARJAY aka Target clearance Christmas wrap so I broke down and bought some at Wally World aka Wal-Mart. I love looking at that kind of stuff. This year I wanted wrapping paper that looked fresh and colorful!

The space above the cabinets in the kitchen needed some color so I used these two frames that I picked up from Ikea and cut my two favorite wrapping paper patterns out and framed them. I turned the one on the left onto its side to offer a little contrast with the one on the right.

These framed graphics make a fresh and modern decoration. After Christmas is over, you can reuse the frames for something else! Or next year you can add a different paper in place! Keep It Simple! I'm sure you'll love it! 


Sunday, December 18, 2011

Frosty The Candle!

Wow how the weekend flew. One week until Christmas! How are you doing? I'm definitely in the spirit this year but I have felt way behind this year in all my errands and traditions. Today one of my best friends took some family photogs of us for our Christmas cards this year. We went to one of our favorite places with the kids. Of all the shots taken I don't think we got a single picture where we were all smiling and looking at the camera. It was fun though and my friend has the patience of a saint! Ha ha! I'm thinking that they might get to friends in family by New Years! : ) 

So this week I'm going to be cramming in as many last minute holiday craft projects of home decor and gift ideas as I can fit! Below is a quick tutorial on adding a little wintry mix to make a candle look frosted!


I got this tall blue candle as a Christmas gift a few years back. It came from World Market and I love the color of blue it is. I have a thing for snowmen and so I thought this would be a fun thing to pair up with a snowman tea light holder I have! 

Using Mod Podge I took a brush and swept the glue all around the candle to cover it!


Next using my hand I rubbed Epsom salts on the candle to cover the candle. It didn't take a lot. I let it dry overnight and shook off excess salts!


I think they make a cute pair on one of our end tables!

It is so easy and it will freshen things up with the lavender scent! If you don't like lavender, get the plain Epsom salts and add your essential oil of choice! 

Saturday, December 10, 2011

Shake 'N Bake Pine Cones AKA Scented Pine Cones!

As Opposed to Shake 'N Bake Chicken! 

I like bringing nature inside. Let me rephrase that. We have recently had signs of a mouse in our house and I do not like that one bit. I'm terrified of hearing a mouse get caught in a trap. Yuck! Anyhow, I like bringing things inside that make me think of the outdoors for simple decor. It's cheap, easy and more personal.

Did I tell you that we went to the beach over Thanksgiving? It was a wonderful break from reality. I certainly found my share of sea shells (no sand dollars - so surprised aren't you?)  but that isn't all I collected this time! The house we stayed in was surrounded by tall pine trees and there were beautiful pine cones sitting all over the ground. I collected a bag full to try and get crafty with them! 


Above are the pine cones I gathered. They're prickly suckers so careful with your fingers!
 
 
First I put them in the sink and soaked the pine cones to clean them. Next I baked them using a throw away pan I bought and never used for anything else. I baked them at 200 degrees for thirty minutes to kill any critters. After they came out of the oven the pine cones looked like they shrunk up a good bit. I was disappointed but I let them dry for a couple of days and they were back to their regular size. After they dried I prepped them and did the shake down on them!

Once dried I painted on a mix of Mod Podge and water covering the pine cones.

I mixed Cinnamon, Pickling Spice that I ground myself and Ground Nutmeg in a  Ziploc bag.

I shook each pine cone separately in the Ziploc bag and added more spices as I went.  

I let the pine cones sit overnight and gently shook off excess spices before displaying them in a bowl. 

They smell great and make for a warm centerpiece for any room in your house. 

Tuesday, December 6, 2011

A Glowing Exterior!

Even the exterior of our house has evolved over the years... I used to do nothing but the old school big snoopy colored bulbs. I'm sure they were fine but I started getting nervous about the lights because they got so hot. So for the past two years I've worked to freshen things up a bit.
 
Yay for WREATHS! I have always wanted to put wreaths on the windows! I love they way they look on other houses so I got wreaths for each window on the front side of the house and hung them up. I toyed with placement of the wreaths. I just LOVE the simplicity of a wreath hanging from a ribbon! If you have the type of windows that fold in for easy cleaning, you don't even need hangers to hang your wreath. Simply stand inside and open your window and hang the wreath through the window where you want it on the outside. When you close the window(still holding the wreath by the ribbon) it will hold the ribbon in place. I did take out my screens to do this by the way. If your window lock is in the middle of the window then the lock will puncture through the ribbon but that is okay because the window is locked and your ribbon is secured.

Here is one of my porch trees. The pot is covered in burlap and I put a red bow on top.I would have shown you both porch trees but my front door has all kinds of kid hand prints that need cleaning. ;)

More windows! I love the way everything came together. It's so elegant with the clear lights and red ribbon! Oh I don't have a picture of it yet but I also put some artificial poinsettias in a planter outside. I'm ready for Christmas except that I'm not!

Did you decorate the outside of your home? I want to hear what you did!

I'm linking up to The Blog Entourage this weekend. Come check out some other bloggers with me!


The Blog Entourage


Sunday, December 4, 2011

The NEW Tree With Ornaments ON

How was your weekend? Did you get to do anything fun or relaxing? Hopefully a little of both. It was a busy weekend here. It was one of those that was such a blur that I hardly remember what we did. I did get the house mostly decorated for Christmas though! I feel like I can relax more and enjoy things better.


I said I would show you our tree so here it is. :) Don't laugh! I think it's is elegant but also looks like it grew up through the house the way it touches the ceiling so Dr. Seuss comes to mind too! My mother-in-law saw this one in a store and sent me the link and I'm so glad she did. I got a pretty good deal on it and it's very pretty in person, oh and came pre-lit = heaven not to have to add lights! It's slimmer than our old one so it fits in the bay window very well and doesn't take up much room. Gosh I could be a sales person for this tree company! :)


I normally put a silver star on top but since this 9 footer hit the 9 foot ceiling I couldn't. Way to go buying a 9 foot tree with 9 foot ceilings. Not the smartest thing I have done lately but I can take a section off and use it at 7 1/2 feet too. I actually folded down the top of the tree to fit it in the room. Whoops! I added a very wide bow to the top as you can see. The walls in this room are a reddish/brownish/sometimes give a terracotta look, and the blue and silver accents on the tree contrast nicely against the walls.


Now that the tree is done I can focus on other things too. I will be sharing some homemade gifts I am working on and some super simple Christmas decorations anyone can do!

Hope you have a great week!


Friday, December 2, 2011

Giveaway Time!

I just love giveaways and anything to do with simplifying things. I found an awesome giveaway to share with you that offers some great ideas to make things simpler.


Jenny at Home-Keeping Hearts is offering an exciting giveaway now thru December 5th. You still have time so don't miss out.


Enter to win two prizes!
1. A lovely book with several craft projects 
2. A subscription to an inspirational magazine


Hurry so you can get in on the fun! YAY! 

Tuesday, November 29, 2011

Dress Up Christmas Porch Trees

WHATTTTUP Peeps? How are things going? I am so psyched because our tree came in the mail today. That sounds terrible, doesn't it!?!?! I know it does but we are doing a pre-lit artificial one this year. So glad it has already got lights on it! We retired our old one where all the branches were color coded and you had to basically build it.

I've been looking for a tree and did buy one a few weeks ago but when I got it home it was too skimpy. So I purchased one online Sunday at midnight just to get that special savings and free shipping. I selected standard shipping and didn't expect it until after the 5th of December. To my surprise it was on our doorstep tonight!!!! Game on! Let the decorating begin SOON! I'll show you how it looks when we get it all set up. Can't wait!

So here is a little project I did because I am a cheapskate! Last year we wanted porch trees to put outside and I swooped this set up at Garden Ridge. 

 
I can't remember how much I paid for them but I do know they were much cheaper than another set I was contemplating getting. The other set was much smaller but in fancier pots. I couldn't see spending nearly double for smaller trees so I got the bigger trees and dressed up the pots with burlap that I sprayed with waterproofing spray so they will weather well.


Just a simple touch adds to the look of the trees and saves so much money! Can I get a big YAY for this one?!?! 


Thursday, November 24, 2011

Hanging Dried Eucalyptus

HAPPY THANKSGIVING!

It's a time for thankfulness and family.
I hope you all have a wonderful day and get to take time out to spend it with your loved ones!

Here's just a simple tip that has a purpose more than just decorating!

I find it uplifting to bring nature inside the house.
Hang a bunch of Eucalyptus over your shower head for a splash of color and a refreshing scent that will help you breath better!

Enjoy!


Wednesday, November 16, 2011

Repurpose Shoe Organizer To Store Medicine

YESSSS! M-I-S-S-I-O-N accomplished! 

It may not look like much but this over-the-door shoe organizer is a helpful, simple solution to calming chaos when it comes to finding medicine in our house. The whole family has been sick for a while now and we are all on different meds, which makes it confusing at dosage time! We have three medicine cabinets that have always been crammed full of various outdated items lining the shelves. I found this plastic shoe organizer at Garden Ridge in their closet organization section. It has clear pockets (easy for wiping clean) and I condensed the items by sorting and organizing. I tossed all the boxes unless they had the dosage information. That saved room!  

The new organizer is hanging on the inside of the linen closet.

Baskets make great storage containers but this one in the kitchen was overflowing with medicine. Digging is never fun when you have a fussy child who is in need of a particular medication. I luv baskets but I think they are better suited when there is plenty of room to contain items.

I luv my label maker. :) Have I said that before?!?! I found an opportunity to whip it out and I did just that to label each pocket. I used plastic labels instead of paper and I didn't go in alphabetical order because I needed to keep the bottom two rows of pockets clear of any medicine that would harm a child. I put all the pills and medicine up high so young children aren't able to access and I also installed a safety door knob cover to keep the kids out. Just make sure if you do this too, to keep baby proofing in mind and keep all dangerous items away from child's reach! Anything that can fit through a toilet paper roll is a choking hazard.


All thermometers are in ONE place. Sounds silly but it really does help.

All first aid items are in a place.

I'm happy about emptying the medicine cabinets and reorganizing! We have one place to look for ALL medicine now, so next time a kiddo is crying or fussing, we shouldn't be scrambling around the house looking for the proper meds!  YAY!


Thursday, November 10, 2011

Antique Sewing Machine and Chair BEFORE and AFTER

Hey, what's up? Okay I feel like I sound like my son who continuously tells knock knock jokes that really have no punch line. Are you guys getting ready for Thanksgiving?  I am so psyched. This year feels different than years past for some reason and I just can't wait for the holidays to get here. I am soooooo craving Thanksgiving dinner already. The comforts of turkey, dressing, mashed potatoes, gravy, deviled eggs... I could go on and on. I LOVE food!!! 

So today I knocked one thing off my to do list! I have been looking around at Christmas trees, pricing and comparing them and tonight I bought one. It's really early but I wanted to get this done so I wouldn't have to deal with it later. I wanted one that was pre-lit to save a little time in decorating and I FINALLY got one! Yippee! I must say though that I didn't get the best deal. I normally shop to get the best deal but people have been saying to just buy the tree you want because you're going to be looking at it for years to come. Anyhow I'll post pix when it gets closer to Christmas and we get it up. Can't wait!

Onto my redo project - Remember the sewing machine and chair (belonged to my grandmother) I inherited from my parents? Well I did a few things to update it and try and make it fit my style a little better. I hope she would approve. :)
AFTER
I spray painted the chair white and covered the seat in a simple fabric that would bring out the white. As for the sewing machine, I like the straight lines and simple style of it so the only thing I did was paint the gold handle on the front in a brushed nickel finish.

BEFORE
Not so much my taste before. The chair was a dull brown with golden legs and a brown vinyl seat.

Legs off the chair so I could cover in fabric!

Stapled it down keeping the fabric taut.

Looks a little hotelish here I guess. Hmmm. Did I make up another word?!?!


I tried to give it more life and make it fit my style. I think it works even though the chair is white and the sewing machine table is a walnut. I hope my Nana would approve! TGIalmostF! Happy Veterans Day! Thanks to all who have served in the military or are currently serving. 


Monday, November 7, 2011

Post Halloween


Hopefully everyone had a great night of trick or treating last week. We had a nice night and here are my kids' costumes so you can see. The little one rode in his paddy wagon and
they had a ball together!


Towards the end of the week I came down with walking pneumonia and I'm trying to take it easy. I'm so used to being on autopilot during the week that I don't know how to slow down and rest when I need to. Just not feeling quite right still. Hopefully I'll be on the upswing soon. 


In the meantime I am beginning to plan for Thanksgiving and Christmas.

My to do list includes:
-pack up the Halloween decorations
-start addressing Christmas cards
-compare prices on a pre-lit artificial Christmas tree but measure from floor to ceiling first!
-work on a Thanksgiving craft project I thought of
-reorganize medications in the house so I'll share that with you too sometime soon.

On that note I am hitting the hay! Hope everyone is doing well and has a lovely week! What were your kids for Halloween? What are you doing to start prepping for the holidays? Talk soon!

Sunday, October 30, 2011

Final Touches for Halloween

Trick or Treat! Hope everyone has a Happy Halloween! I wanted to post some last minute decorating ideas. 

Below is a recycled Ikea candle holder - I sprayed candy corn with Krylon Preserve spray and put a tea light in the middle.


Mummy pumpkin - I wrapped in gauze and taped googly eyes. Toilet paper works well too!

Here I cut strips of scrap book paper and glued them to the pumpkin using a paint brush.


I recycled milk jugs and made ghosts. All you do is paint faces and cut a hole in back (puncture with sharp knife and twist in a circular motion until it begins cutting and make about a quarter sized hole). Push clear lights through backs. I put marbles inside to help weigh the jugs down. They are super cute when it's dark! Kids will love them!


I picked up paper cutouts and punched two holes in each, and threaded wire ribbon through to make staircase garland.


Here's another idea for a pumpkin. I didn't make this one. We had a pumpkin decorating contest at work and someone else made this one but I thought is was pretty wicked. 


This is a recycled Glade glass candle holder - I used acrylic paint and casually painted each color and let dry before applying next color.


Same method of gluing strips of scrap book paper as above but this pumpkin is made of Styrofoam.

Taped wire spider web to a mirror


Have a safe and happy Halloween!

Saturday, October 29, 2011

Knock! Knock! $1.00 Skeleton Wreath

Hope you're having a great weekend! I had a really nice day today and am excited to have finally completed the kids' Halloween costumes. My mother-in-law actually found the perfect solution for my youngster's costume today. Can't wait to go trick or treating!

Thought I'd share the front door wreath I came up with for $1.00! The actual wreath was freeeeeeee. My mom gave it to me last time I visited so I figured I could do something with it. 
 

I was in Dollar Tree one day and found a strand of little skeletons on twine. I pulled the skeletons off the twine and hot glued them to the wreath and there you have it. That is how I made this spooky wreath for a buck!

Friday, October 28, 2011

Pumpkin Jar


I made a jar pumpkin using vinyl I cut out by hand. So simple your kids can do it. I painted the lid with black spray paint and put a battery operated candle inside!


Thursday, October 27, 2011

Chunky Candy Corn Wreath

Everybody has probably tried this wreath already and I may be the last to find this one but it was so fun to make. I still don't like the taste of candy corn though!

All you need is:
A wreath of some sort
Black duck tape
Three bags of candy corn
Glue gun
Ribbon
Krylon Preserve spray which can be bought 
at a craft store

Wrap your wreath in the black duck tape.

Use the glue gun and cover your wreath!
I went with a pattern and simply covered the entire wreath.

I used the Krylon Preserve spray and sprayed the wreath down to reuse and avoid bugs!
I used ribbon from Dollar Tree to hang it.
I think it's super cute!


Monday, October 24, 2011

Up To Eyeballs In Whimsical Halloween!

It's a week until Halloween and we're counting down! I think Halloween is my favorite holiday. Dressing up in costumes, decking the house in pumpkins and ghosts galore is so much fun. Really I don't have many Halloween decorations so this year I have been making a lot of my own to add some color and fun to the house! Here is one silly centerpiece I did. 

I collected sticks in the back yard and painted them black! I used craft paint and applied it using one of those craft sponges on a stick. Then I found some silly eyeball foam stickers and I scattered the eyeballs all over my wooden vase for fun.
 

It has transformed the dining room into silly Halloween! We can't be too scary because of the kids so this is fun, colorful and whimsical! 


Sunday, October 23, 2011

Rock 'Em Sock 'Em

How is everybody? I'm tuckered out. I was going to try and post some of my Halloween creations but have been doing three loads of laundry this weekend. Here is a nifty organizational aid for doing laundry instead. I'll just have to do a cram session of Halloween decor before the big day gets here which is only a week away! 


Oh I detest laundry! I don't really like any part of it and I am one of those who will turn the dryer back on a couple of times to "fluff" what is in the dryer just so I don't have to fold it. Oops did I actually just admit this?? Folding laundry and matching up socks are just miserable to me. Ha. Matching socks seems to be worse though. Sooooooo - I bought ALL new socks for the kiddos. I got completely different socks for each child to help tell them apart. For sanity's sake and as a time saver, I found these garment bags BELOW at Wally World AKA Wal-Mart in the laundry gadgets section for about $0.87 a piece. I think they were meant for other kinds of undergarments but hey, they work.  


"You gotta'keep'em separated" (Remember that song by The Offspring?!)! In all seriousness it cuts time to separate the socks into separate bags before washing. It makes the end of the process smoother. Less time, less fuss = thumbs up! I will never LOVE doing laundry but this at least helps. Have a great week and I can't wait to see what spooky things people are coming up with!


Sunday, October 16, 2011

Bad Dye Job- Don't Quit Your Day Job!

Hello fellow decor friends! How are yous guys (and yes, I meant to say "yous") Things have been busy around here trying to keep up with every day things and trying to fit in some decoration projects. If we could afford to hire a maid for regular house dusting and bathroom scrub downs to help with some of the chores around here, that would be awesome but I think I'll have to keep on dreaming! I've been busy working on Halloween decorations but have been meaning to post this failed attempt at dyeing a night light lamp shade. I totally ruined a perfect little night light lamp shade. Leave it to me. So here it is!


I love the way mod-styled lamp shades have trim work in a solid color. I tried to use ribbon but struggled getting the ribbon just right. I thought it would be cool to dye just the top and bottom border of the lamp shade. I thought this would solve my problem of not being able to get ribbon where I wanted it. NOT!

I picked up some fabric dye and the color, so I thought, was supposed to be more of an olive green so that was one of the first fails! I made up a bowl of dye and dipped the lamp shade into it so that the shade was very level to get a nice even border of green. You can see for yourself that the dye ran and it just wasn't as crisp and fresh looking as I had hoped. 


Oh well! What kinds of projects have you tried that were total flops?

Friday, October 14, 2011

Mommy To Do List

Oh my gosh my heart is racing. I'm typing while watching the first episode of  this season's The Walking Dead. The host of Talking Dead, the after show, just took the words right out of my mouth. Holy SHITE!!!
So how was your weekend?!?! HeeeHeeee. I've been waiting for this show to start back and boy did it! As my fellow mom friends know, we are always doing more than one thing at a time. I wanted to see this show so badly that I actually ate my dinner standing up in the kitchen, doing dishes while watching the first part of it. I usually can't eat during anything gory!

My weekend was pretty B-U-S-Y. Full of sick boys from the husband all the way down to the little pooty tat. Last weekend was an awesome kid-less weekend at the beach with two girlfriends so this weekend was mostly catching up on things and I don't think I'll ever really be caught up on anything! Is anybody else with me on that? So here is the latest and greatest To Do list to try and help myself keep it together. I have a different one at work but this is the daily one for the week at home. My new little obsession is self-sealing laminating pouches and I found them pretty useful here.

I typed up a Morning and Evening list of items to hang on the fridge as a friendly reminder to self. I used Self-Sealing Laminating Pouches to laminate the page and I did it on an 8 1/2" X 11"  page. I used a cute font and used boxes so I could easily mark them off with a dry erase marker. With a child in school now, I cannot forget lunches. As you can see, I still have a lot to do before I go to bed so I need to bolt.
 
On a side note I made these bubble magnets and did a tutorial a couple of years ago. The magnet to the top right is quite fitting, dontcha think? It's pretty special to me because it's one I made for my grandfather and his late wife who is near and dear to my heart. This is a saying they used to say and it caught me off guard the first time I heard my grandfather's wife say it. I about fell out of my chair in laughter! Like everyone in the family, she had an awesome sense of humor.

Since I still have quite a bit left to do tonight,  I am signing off. Nighty night!


Sunday, October 9, 2011

Decorating With Candy Corn

BOO! Did I scare you? So how was your weekend? Hopefully good! I did my yard sale on Saturday and I said this once and I'm going to say it again - NEVER AGAIN! ha ha. I'll probably eat my words again but it was a total bust and so much work for not much payoff! I made three signs to advertise, and after the whole thing was said and done, someone had removed my most important sign that pointed in the direction to our street. Boo Hoo! Don't make me cry!


So here's a quick Halloween decoration that is super cheap!

I bought a bag of candy corn at CVS for 88 or 81 cents, well under a dollar. I had some baby food jars leftover from months ago that I spray painted the lids with a "pewter" spray paint.I decided to pull out the CRICUT and cut out the word B-O-O. So I did. I used black self adhesive vinyl and used the BIRTHDAY BASH cartridge and cut out the letters in about a 1" font.


I stuck those puppies on and here you have it. You can line up your cute little jars or stack 'em up! Have fun with it! My son had a ball filling the jars! 

I'll be sharing my Halloween mantel as soon as I get the chance. Can't wait to show you how it turned out! Have a great Monday!

Sunday, October 2, 2011

How The Bag Lady Organizes Paper

How was your weekend? Hopefully good and hopefully you got to do something fun! I spent time Saturday cleaning our kitchen table. For all you moms out there I know you get this or at least I hope I'm not alone, but I had to take the razor to the kitchen table and chairs and do some SCRAPING. So totally disgusting but so necessary. It's just one more thing that makes mom's job a dirty one!

No matter how much I clean up after the kids, the table and chairs get so grimy! EEWWWWWW period! (exclamation point) You get it. I know you do. Oh and my child went to two birthday parties and the one today, I think, went to his head a little. It was a "Jedi training" party and afterwards he kept telling me that he was using the "force" on his brother when his brother would fuss or fall down or something. Brotherly love!

Anyhow here is a small project that has made a difference in some of my paper clutter. Every little bit helps, am I right? It was so simple but has made a tremendous difference and that makes me especially happy. :)

I am an avid couponer and try and swap with friends and I save all receipts until they go through at the bank. Instead of letting things pile up all over the place, I keep these two bags hung on a wall rack. They stay there collecting coupons to be swapped and papers to be shredded. When it's time to take them to work or an office store to shred, then I'll carry the paper in grocery bags. These have really helped me stay more organized. 

For this little project you can pick up bags at a craft store. I got mine at Hobby Lobby. You also need to get iron on letters. You simply use an iron on the dry setting and follow the directions on the packaging. It'll tell you how long to hold the iron over the letters.

It's funny how the simplest things can make such an impact on organization and routines. What way works best for you in organizing? What kinds of things do you do?


Thursday, September 29, 2011

Candy Corn Time

I like CANDY and I like CORN but I'm not a big fan of candy corn. It's almost October though and I thought this would be fun to try. Here's how I saved this "fail" project! ;)

My "save" below which I think turned out nicely. 

My sad attempt of candy corns below.
I used Styrofoam cones and plaster of Paris. I used small cones and cut them down with a knife to give them a flatter shape. I mixed up the plaster and from the get go I had trouble with the consistency. I followed the directions but it was too soupy. I still spread the cones with the plaster and let it set for 24 hours. I wet sanded them and it was hard, REALLY HARD so I quit and one cone looks like that one character on Yo Gabba Gabba with all its lumps. The poor thing.

I had the most success with this one below. I used acrylic paints and probably should have made the orange stripes a little wider. Oops.

I wasn't completely thrilled with the result and I found this adorable idea of using yarn by Thrifty Decor Chick and thought I'd give it a whirl! I picked up yarn that was on sale and got more muted shades of the orange and yellow but I think it works. It gives it a more rustic look. All I did was wrap the Styrofoam cones until they were covered. If you want a workout for your arms, try this craft. 


What are you doing to get in the Fall spirit?

Tuesday, September 27, 2011

One Organized Attic

Giddy is me! I'm very sore but excited to reveal our clean and organized attic. I have spent the past two days cleaning and reorganizing our attic and man was it a workout! Guess it was all the kneeling, squatting, crawling and lifting that did it to me. It was a project that was a looooooong time coming and now that it's done and I am so pleased with it! There is actually floor space and room to move around in there! High five to all! Booyah! Hah if you saw the BEFORE pictures you might be a tad impressed because it was, eh um - atrocious!  I was too embarrassed to share the filth and chaos before I started. 

To give you an idea; you could step into the attic but you couldn't move anywhere. These rubbbermaid boxes were unlabeled, tossed and stacked and there was junk everywhere. There was just no rhyme or reason to the organization whatsoever. We moved into this house when I was nine months pregnant with the first child (several years ago) and ever since we've lived here it feels like we have been trying to just get by. Little by little we're getting there.

Don't you just love the neat and organized Rubbermaid tubs?!?! I do. These are the types of things that give me great feelings of accomplishment! This room was a total disaster and I slowly and very carefully found a place for each item we decided to keep. I started prepping for this overwhelming undertaking a week ago by going through kid's closets to sort and weed through their clothes to update their closets by size and season. Thank heavens for my mother who helped me do that. It's hard to get much done with munchkins who want to "help" Mommy do everything. The dining room table is currently covered with clothes and misc items to sell in a garage sale. 

Night before last I went to town organizing. I pulled all cardboard boxes out of the attic that we didn't need and made a pile to take to the recycling center. I can mark that off my list because I visited recycling today!
I really tried to work with the space, feel the space and move things around to make better sense of how it's used for storage. I thought it might work to pull all the Rubbermaid tubs out and line them up one by one that way there would be no lifting and moving them around. I labeled each storage container on the lid and on the side exposed so you can make out what the contents is in each box.  
Pretty sweet! I grouped all objects and items and put them in the best possible locations as far as size and room. I flipped up my large scale paintings so they took less room. The luggage is near the door for easy access. I tried to organize things in the attic where they made the most sense.
As for the countless bins I used my label maker and put two labels on each bin, one on top and one on the side so they're easy to find. Half the bins hold children's clothing so I grouped the bins by size and put the nearest closest to the door so I can locate better.


It feels like a weight has been lifted now that the attic is organized and clean. I even took the broom to it this time! A big YAY! What does your attic look like? How do you organize yours? It's the one room you don't see in most people's homes but man does it drive me crazy in our house, well not anymore. ;)


Thursday, September 22, 2011

Piling Up

Oh the piles! Tis the season for decking the house out and I'm already cluttering before getting started! It never fails that there are ALWAYS piles of things taking over rooms in our house! GRRRRR! These are bins from the attic and they are all children's clothes. I spent one day last weekend sorting and organizing hand me downs from one child to the next. They keep outgrowing everything so it feels like a constant cycle of changing out their clothes.
 
Next it's cleaning out the attic and fixing it up in an organized fashion. This means another yard sale even though I just did one in the Spring! We have way too much stuff and for sanity's sake I have to weed and get rid of things. Between sorting and organizing to put things back in the attic I'm making piles of things that we don't use to sell. The neighborhood isn't doing a Fall sale so I've got to get a permit and advertise on my own. Wish me luck! I have bags of toys and things scattered through the house to sell which will make this pile grow for the next couple of weeks. For sanity's sake I am on a mission to declutter yet again! Yee haw!

What are you doing to organize and declutter?