Thursday, March 27, 2014

Finally Hung My Flower Mirror!

YAY! One more little project I can knock off of my to do list! I FINALLY hung my Flower Mirror up! I LOVE it! I got my mom's opinion on where to hang it and that helped so much! Sometimes it takes another person to say YAY or NAY to something! Have you ever used duct tape to hang something? I hadn't but since this was homemade and also delicate, I used duct tape as an easy remedy. I didn't have to glue or hammer anything into the back of this and it seems to support the weight of the mirror. 

Instead of using a wire as the hanger, I rolled a long piece of duct tape and taped it down with a lot of long strands of tape. I figure if Myth Busters can use tape to survive on a deserted island, then this should work to support a wall hanging. No one is going to see the back of it anyway! Happy DAY!


Friday, March 21, 2014

I Heart "To Do" Lists!

TGIF! Hope you have a great day!
 
Do YOU like "To Do" lists? Do you make "To Do" lists? I do and I LOVE them! They help me get things done and I love the feeling of marking things off my list! Such a great feeling of accomplishment! It's not for everyone but for me it's a great organizational tool!
 

So what is on your to do list for today? I got a good workout in this morning so now it's time to focus on getting some things done around here. I have a loooong list of things to do. I've also been working on a lot of little décor projects around the house that I'll be sharing real soon! Until then take it easy! Lots of exclamation points!!!! :) Happy Friday!

Thursday, March 20, 2014

DIY Curtain Measurement Fail!

 
Haha! Sometimes you have to laugh! This is the Ultimate DIY Curtain Measurement FAIL! I think that is what happens when I try to stay up late to work on a project. The rings aren't spaced correctly and the curtain needs more curtain!  
 
As soon as I redo this one I will tell you how I did it. Right now I can see a glimpse of CUTE but it's not exactly CUTE. Luckily I have more fabric to work with so I will share when it is complete!


Tuesday, March 18, 2014

Organizing and Labeling Toys

Happy Tuesday! Hope you had a great Monday and a great St. Patrick's Day! I'm surprised my oldest didn't get pinched yesterday because I totally forgot to dress him in green! Way to go, Mom, huh!

So in cleaning up and organizing children's rooms and toys, I found this number at Tarjay (several months back might I add) and I found these adhesive chalkboard labels at Michaels last week. I was going to use my Cricut and make my own tag type labels but the more I thought about it, the more I thought that was overkill. The boy can read now so I didn't need to go overboard with tagged pictures on basket handles. He can read and write so I thought chalkboard labels would work great. I found them in the cheap-o section at the front of the store and they were 40% off so they were a buck something for a pack of 12 labels. Not too shabby. At first my son wrote the categories of the labels but then didn't like his handwriting and asked me to do it. He said he couldn't read his own handwriting. Uggh! Haha!


I think these labels work out great because they aren't in the way of the handles, you can see them and they can be changed with any new toy switch out we have! Below is the organizational system from Tarjay AKA Target! It works great and the kids can easily pick up after themselves with this shelving system! How do you organize the toys in your house?  


Saturday, March 15, 2014

Urge To Purge

I am seriously in PURGE mode! Do you ever get this way? Hope this finds you well. I am in total "Spring cleaning/wanna get everything in order and cleaned up" MODE! This means I'm going through EVERYTHING and getting rid of things we don't need or use. 


I have been reading a lot on minimalism and I would LOVE to be able to live a more minimalistic (did I make a new word???) lifestyle. I am tired of the clutter and chaos STUFF causes. It's not worth it! I find that extra gadgets and things are just not worth it. If it's not necessary or we don't LOVE something or use something, it's going. This week was been freeing in a lot of ways. I dropped off a FULL car load of children's clothing and toys off at church to sell and it was well worth it this time. Most of it sold. I priced everything fairly low and it really did the trick. I have had those experiences though where I said I would NEVER do another consignment sale because it was too much work for too little profit. This time I am happy to say was different! 

So there are piles everywhere. Well in two rooms anyway. I've got a pile of projects to work on and a pile of things to sell. It's getting better though. I've got another trunk load of bags to drop at Good Will this week but want to add to it before going. I've gone through closets, drawers, cabinets... I have just about gone through most everything in the house and piled up things to donate or sell. As for selling, we have another garage sale coming up soon so I am piling up items for that too. Organized purging! It's so freeing! How about you? Do you go through purging phases? Hope you have a great rest of the weekend!  


Wednesday, March 12, 2014

DIY Sign - No Soliciting

How are you? I am pooped! I have spent a big part of the past week pricing and tagging items for a consignment sale and today I finally emptied my car out! Woo hoo! 

So a couple of weeks ago we had a chain of sales people going door-to-door in our neighborhood even though there is a NO SOLICITING sign at the entrance.It kinda creeps me out when I am home alone and the door bell is constantly ringing and it's strangers. Last week I had one man come and try to sell me something and I was on the way out. I wasn't rude but told him I couldn't talk. So he told me his name and then next day he showed up again with another man and he gave me a different name for himself. Uh scary!!! He asked me a lot of questions and I do not give information to strangers like that. At that point I thought I might need to make my own NO SOLICITING sign. So here it is! 

It's quite simple and turned out okay for a quickie craft!

Supply List
Lettered Stencils
Pencil
Sharpie Oil Pen
Stone with hanger

 I used stencils I bought a Dollar Tree months ago.

I simply tested the lettering on a piece of paper the same size as my stone before I traced onto the stone to make sure these words would fit. Using a pencil I traced the stencils on the stone, eyeing it. Next I took the permanent oil pen and filled in the letters. Can't wait to hang it outside tomorrow!

Wednesday, March 5, 2014

Kids Rock And I'm In Shock!

Tonight out of the blue my kids started having a discussion with each other about selling stuff. Before I knew it and without any coercion they had made a huge pile in their play room of toys, books, games, dvds, and other things to sell. I'm currently tagging clothing to sell and was shocked to see how my boys went back and forth about their toys and talked to each other about what they wanted to sell and keep. They were both very concerned with each other's feelings about each item and it warmed my heart. I asked them about several of the items because I was concerned it was too much for them at such a young age. It amazed me! At one point the oldest was asking the youngest about a particular car toy and the youngest decided to keep it because he got it when he was hurt and in the hospital. Just heart warming to see the boys do that. Here is the pile they came up with.


The boys bagged them up because it made them a little sad and they wanted to get the toys out to get some new toys. I'm proud of my two little guys! Do you let your kids go through their toys to donate or sell? I think it was a really good experience for them!

Tuesday, March 4, 2014

DIY Reusable Dryer Sheets - The Natural Way

Pinching pennies and all, I am tired of paying for dryer sheets. They aren't horribly expensive and I'm sure it sounds silly, but it seems like it doesn't matter how bulky the box is, we still go through them quickly. Doesn't mean I'd ever look for a substitute for t.p.(gross me out!) but anything I can save on, I will try!

With such a simple thing to make, I just couldn't pass it up and wanted to share! These are all things I already had so it didn't cost me any extra to make!

All you need
1/2 cup White Distilled Vinegar
1 Sponge OR 1 Washcloth cut in pieces
10 drops of Tea Tree Oil plus extra drops of essential oil for a nice scent if you choose (I didn't have any extra essential oils so I only used tea tree oil) 

This is an all natural recipe and so far I haven't had any trouble with it and I also haven't had static cling. It's definitely worth a try. So far I've been using these for a couple of months.


All you do is cut a sponge in strips. Pour 1/2 cup of vinegar into a sealable container and add ten drops of tea tree oil. You can add another essential oil if you prefer a different scent. Then put the sponge in the container and seal. Let the sponge soak up the mixture. You can keep using the sponges for a while. I've been using the same solution for about a month so far and haven't had to replenish. I just put the sponge back in the container when I'm done and it soaks up more. My husband doesn't like the smell of vinegar but so far he hasn't even noticed. I think the scent is fresh when it comes out of the dryer so it's hardly something to worry about. Do you think you would try this??? 


Monday, March 3, 2014

Microfiber In The Kitchen? Yay OR Nay?

Just finished cooking lunch in the kitchen, and not that anyone needs my opinion, but I don't really care for microfiber dish towels. I have been thinking it for a while but have never really said it. I got these a year ago or so and I love the whimsical roosters in bright colors but I don't LOVE the way they feel on my hands.  I prefer good old terry cloth something or another all the way, baby! HA!

I mean, for dusting and using the microfiber cloths for damp cleaning seems to be okay but I'm not a fan of a dry microfiber cloth. It pulls at my hands and makes my skin feel even drier. Now that I have given you my opinion, what do YOU think about microfiber dish towels???


Sunday, March 2, 2014

Chrysanthemum Spoon Mirror

So how are you doing? Can't believe it has been a week since I last posted. Just goes to show how busy a week can get. So what have you been up to??? 

I'm excited to share the latest craft project I've done. A good friend found this and we started it together. LOTS of trial and error on this one but it was fun! 

My friend found the project on Pinterest by Addicted To Decorating. The blogger Kristi, who came up with this, is very creative and did an awesome job instructing on how to do this. I love hers. I think we learned some things along the way but it was a lot of fun to make!
  
Supplies Needed
  • 6 Boxes of plastic spoons 48 count
  • 2 MDF wreaths from craft store - an 18-inch one and a 12-inch one
  • 1 Mirror - 12"
  • Spray paint w/ primer OR acrylic paint and paint brushes - I used Rustoleum spray paint
  • Duct tape
  • Glue gun

 
First tip - Find heavy duty package cutters instead of regular scissors. Also maybe test your spoons and scissors to make sure you are able to cut them okay. We bought white spoons that were Harris Teeter brand. We tried using scissors and Dollar Tree spoons and it just didn't cut it. Get it?!?!  
I didn't get any good pictures of the start of the project but you use the handles of a handful of spoons and glue the two MDF wreaths together. Next glue scrap book paper over the gap between the two wreaths. After you do this, you can begin cutting and gluing the spoons to the front of the wreath. I started on the outside edge and worked my way in.
The inner edge of the circle was a little tricky. I tried to use my "cleanest" cut spoons so the center part looked fairly clean. I went all the way to the edge.
After I was done attaching spoons, I took the wreath outside and spray painted. I used this paint below to prime the spoons and after it dried, I gave it a color coat. You could easily just use a paint that has the primer built in but I did it this way because I already had a can of the color I wanted to use.
 
Painting was fun. The only issue I ran into was trying to get glue strings off of the spoons. Be sure to do that before you paint!
I glued the mirror to the back of the wreath. I traced it so I would know where to glue the wreath.


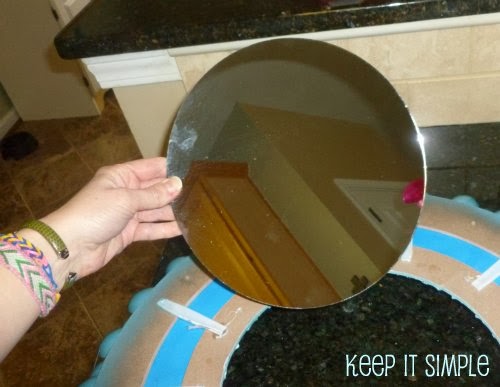
The glue gun didn't work because the glue dried too fast for the mirror to adhere so I scraped it off and used a tacky glue and then duct tape but didn't get a picture of it.
Here is the final and I really like it. I kept it a solid color and I think I have decided where to hang it but want to get my friend's opinion first! What do you think? Do you think you would ever try this???


I’m linking up to the Something to Talk About Link Party today.  Go on over and see all the fabulous diy, crafts, furniture makeovers and more.